 The day that everyone long predicted arrived. Video is no longer a novelty online and Flash video has become the darling of the web, favored by video giants like YouTube, DailyMotion, Break, and many others. What makes Flash so special? Not only does it combine good quality with great compression, it comes with a video player that is already in use by 95% of Web surfers. While some designers have started migrating away from Flash because of its well-publicized incompatibility with the iOS platform, on the regular desktop web, Flash still dominates, and will for some time to come.
In this column, you discover just how easy it is to convert video to Flash, and get a look at how the well-integrated programs in the Adobe Production Premium software package make it easy to get your video ready for the Web. Once your video is ready, just follow the step-by-step instructions in this column to add the file to a web page with Dreamweaver.
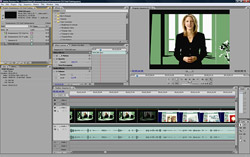
Step 1: Edit Your Video in Premiere
Adobe Premiere Pro is a professional video editing tool capable of handling a wide range of video formats. Create a new project, import in your video, and you’ll find all the features you need to edit, enhance, cut, and create transitions for your video.
![[DW-CS3-FlashVideo-01.tiff]](https://www.digitalfamily.com/dreamweaver/images/insert-flash-video/DW-CS3-FlashVideo-01.jpg)
Tip for Template Users
If you are adding a Flash video or animation to a page created from a .dwt Dreamweaver Web Template, you may run into trouble if your template doesn’t have an editable region in the head area of the page. If you ever receive an error message like: “you don’t have permission to change that part of the template,” you need to update your template before moving on to the next step.
If you’ve created your templates in Dreamweaver version CS4 or later, you probably won’t have this problem, but you’ll know right away if you do have the problem because as soon as you try to add a Flash file you’ll get the error message. To make sure your templates will work with Flash files, follow the instructions in my Dreamweaver FAQ and then come back and you can complete this tutorial. (As you’ll see, you’re not the only one who’s had this problem.)
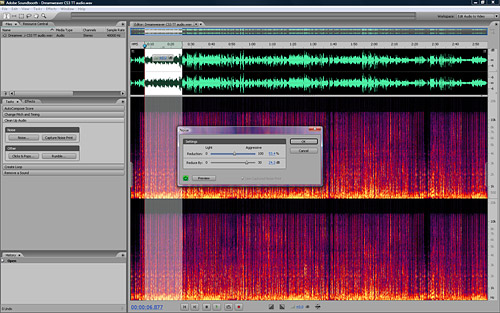
STEP 2: Clean up the Audio in Soundbooth or Audition
If you want to improve the sound quality of your video, add audio tracks, or other sound effects, open your video file in Soundbooth or Audition and you can adjust sound levels, clean up noise, and choose from a wide range of filters to enhance and alter sound quality. The compression you do to video before you put it on the web can have a negative effect on sound quality, so it’s a good idea to start with a video file that sounds as good as possible.
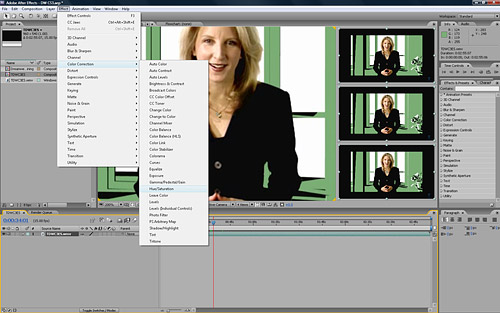
STEP 3: AfterEffects
If you want to really dress up your video, add special effects, or apply any of a wide range of filters to your video, your next step is to open your video in AfterEffects. The learning curve on AfterEffects is steep, but you can use this program to make dramatic changes to video and create amazing special effects. Hollywood’s got nothing on you, kid.
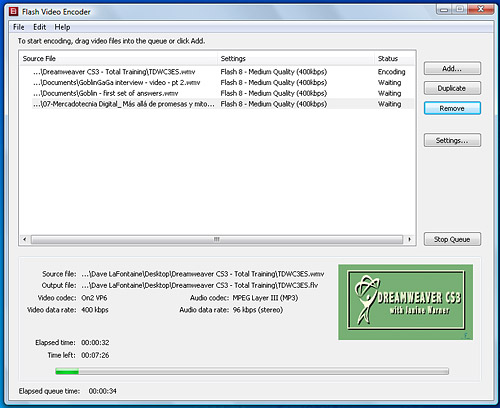
STEP 4: Flash / Media Encoder
Finally, you need to optimize your video and convert it to the Flash format, and the best way to do that is with the Flash or Media Encoder. You’ll find many settings as you go through the conversion process, but the basic principal is similar to optimizing an image: you want to compress the file as much as possible for the fastest download speed, but you have to balance that against the impact on quality. (You find more detailed instructions for using the Flash Video Encoder in my Flash Video Encoder tutorial.)
STEP 5: Open or Create a Page in Dreamweaver
Once your video is in Flash format, launch Dreamweaver and create a new page or open an existing one. Format the page as you would any other page and make sure to save it before you add your video.
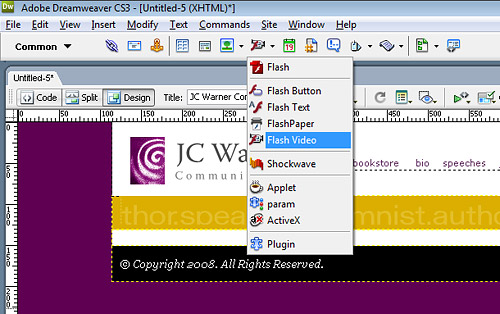
STEP 6: Insert Flash video file
Click to insert the cursor where you want the Flash video file to appear and select Common from the Insert bar, if it isn’t already selected. From the Media drop-down list in the middle of the Common Insert bar, choose Flash Video. You can also choose Insert>Media>Flash Video.
STEP 7: Specify Settings
At the top of the Insert Flash Video dialog box, specify streaming or progressive. Note that you must have special software on your server for streaming video. Check with your Internet hosting service or system administrator to find out whether your web server supports streaming Flash files. If not, choose progressive. Then click the Browse button and select the Flash file from your hard drive. If the file is not in your site root folder, Dreamweaver will offer to copy it there for you. This is important, because the Flash file must be uploaded to your Web server when you upload the page that displays the file.
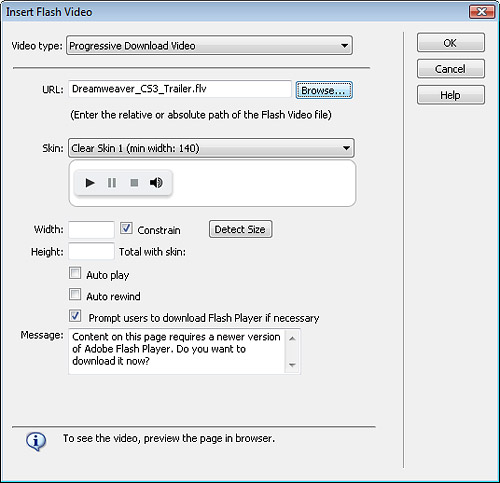
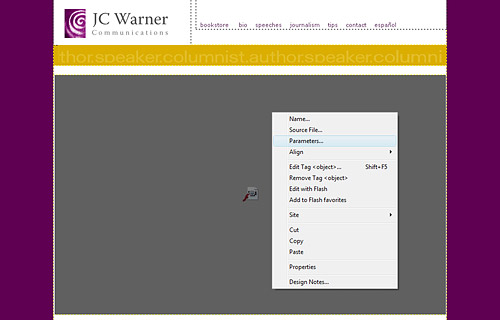
STEP 8: Choose a Skin for the Player
Choose a Skin from the drop-down list. (Dreamweaver calls the controls for a Flash file a Skin.) As you can see in this figure, a preview of the selected skin is displayed in the dialog box when a Skin is selected. You can choose from the nine Skins that come with Dreamweaver or you can add new skins created in Adobe Flash.
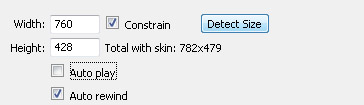
STEP 9: Set Size, Autoplay, and Rewind
Click the Detect Size button and Dreamweaver will automatically insert the height and width of the Flash file in the HTML code. If you want the Flash video to play as soon as the page is loaded, click to select the Auto Play check box. To automatically rewind the video after it has played, select the Auto Rewind check box.
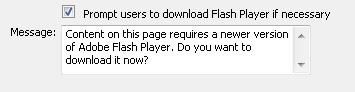
STEP 10: Prompt Users to Download Player
The Prompt Users to Download Player If Necessary option creates a message that is displayed on your page if visitors to your site do not have the Flash player installed. You can edit the message in the Message box if you want to change the words. For example, you might use something like: “Join the modern world — get the latest Flash player already!”
STEP 11: Complete Flash Video Insertion
Click OK to insert the Flash file and close the dialog box. The Flash file is represented in the Web page by a box that is the height and width of the video. Click on the box the represents the video and in the Property inspector at the bottom of the workspace, you can make further adjustments to the settings, such as choosing a different skin for the player.
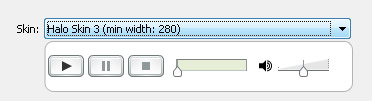
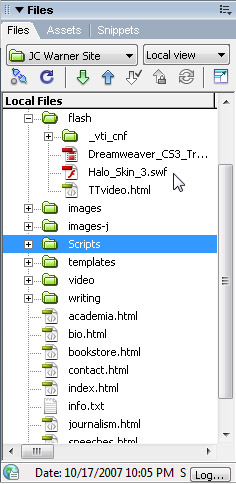
STEP 12: Verify Scripts Folder
When you insert a Flash video file with a Skin, Dreamweaver creates a Flash file with the .swf extension and saves it in your root site folder. This Flash file contains the player controls. In this figure, you can see the file called Halo_Skin_3.swf which contains the skin. Similarly, when you save the page, Dreamweaver automatically creates a special script that helps the file play better in some web browsers. That script is saved into a folder called Scripts. Both the Scripts folder and the .swf file with the player must be uploaded to your web site when you publish the page in order for the video to display properly.
STEP 13: Preview the Page in a Browser
To view the Flash video, you need to preview the page in a web browser. You can do that by clicking on the Preview button at the top of the workspace or by choosing File>Preview in Browser and then choosing a browser from the drop-down list. You must have the Flash player installed on your computer to view the Flash video. (Note: the Flash Skin, which contains the play, pause, and other controls, becomes visible when you roll your cursor over the bottom of the video.)

STEP 14: Learn More About Flash Parameters
To learn out more about Flash video parameters and other more advanced settings, visit www.Adobe.com and search for Flash video.
I followed your instructions to insert a flash video, tried it in CS6 and Adobe Dreamweaver CC 2014.1 the video shows in Firefox but will not show in Safari. Please help.
Thank you,
Redbarn Music
How do you rotate flv files? My site has 19 videos that are 90 degrees wrong. Thanks
http://www.stockport-clarion.org.uk/TimeTrials/VideoTT/Video30thMay2016.html
Hm. There are two ways you could do this – you could use a CSS function to rotate the Divs that you have the FLV files in (see: http://stackoverflow.com/questions/14233341/how-can-i-rotate-an-html-div-90-degrees). But this would be a bit of a kludge, since the video would be playing, and then the web browser would have to rotate everything – you would probably end up with stuttering or poor resolution. Best option would be to get the source files, and put them into a real decent video editor and do the rotation there. If you’ve just got the FLVs, you can still do this in a program like Adobe Premiere, but the output is going to be a little degraded (you’re basically going to be re-compressing a file that’s already been compressed – kind of like making a copy of a copy).
Hm. There may be a Flashblocker in your Safari browser – or are you trying to play it on an iOS device? If so, obviously, Flash will not work.